This page may contain affiliate links. If you click and make a purchase through these links, I may earn a small commission at no additional cost to you. Click here to see my full disclosure policy.

Thursday, March 24, 2011

NEWS FLASH! Want a Silhouette? Read on!

 
OMG! I just found out about this SUPER EXCITING NEWS! I can't give you the full details but if you want a Silhouette, you NEED to subscribe to the Lettering Delights newsletter NOW. If you are already a subscriber, make sure that you read the next newsletter that is coming really REALLY soon.

Seriously, you don't want to miss this.

To subscribe, just click here and enter your email address. Don't forget to CONFIRM your subscription on the subscription confirmation email.

Also, just so you don't miss out on any Lettering Delights news, go Like Lettering Delights on Facebook. Click here to go there and just click LIKE.


And tell them that "Jin sent you". ;-)


The Silhouette SD Review (part3): Cutting with MTC

=================================================
UPDATE: Please note that there is now a MTC-Silhouette Plug-in available that has made cutting to the Silhouette a lot more easier than described in this post. For more information, please read this post: Silhouette SD Plug-in Now Available!
=================================================

My post yesterday seemed to have stirred up even more questions about the Silhouette SD. I can't answer every question in detail right now because I am still trying out this machine but in a nutshell, I used the Silhouette Studio to do the Print-and-Cut (PNC) yesterday because that was supposedly the best way to do PNC with the cutter. I am still going to continue using Make-the-Cut to do my projects, especially when Silhouette Studio is unable to open SVGs. There is a round-about way of getting the SVG file into the Silhouette Studio and it involves converting the SVG file into a DXF file in a program like Inkscape, and then opening that DXF file in Silhouette Studio (see scrappydew's tutorial here).  The whole point of me looking for a new cutter is so that I can use Make-the-Cut. However, if I decide to keep this cutter, I will use Silhouette Studio for Print-and-Cut and Make-the-Cut for everything else. By the way, my card yesterday was made with a Lettering Delights' GRAPHIC set and not SVG.

By referring to this tutorial, I managed to setup my Make-the-Cut to cut to the Silhouette, but not before spending too much time trying to figure out why the Silhouette wasn't cutting. It turned out that I did not set the correct printer port when I was adding the Graphtec CC330L driver. My video tutorial below will walk you through the steps of adding the driver and setting up Make-the-Cut so that it cuts to the Silhouette SD.


----------------------------------------------------------------------------
Additional tips: (added 4/17)
If you can't find the Graphtec CC330L driver in your computer, go to this link to get it.  

Also, there are 2 additional steps that may enhance your cutting experience. Please refer to this post before cutting to your Silhouette SD cutter from the Make-the-Cut program.

---------------------------------------------------------------------------- 

Tammy, a blog reader, had asked that I cut out a frame from Lettering Delights' Provencial Princess SVG set, to see how it looks like when cut out with the Silhoutte SD.  


I imported the file at 72 DPI (Use Actual checked) and did not change the dimensions. The frame measures 3.1948" x 3.9123" and this is how is looks like when cut by the Silhouette SD:


I used the Kraft cardstock that I bought from Michaels' (recollections brand, 65lb) with the PINK blade cap and I found that there were several places where the cut wasn't all the way through. I had to do some creative weeding in order to get to this:


Despite that the machine can't cut very deep, I was happy with how nicely the cut out turned out.


Next, I cut the same design in the same size through my Cricut Expression. I set Pressure at maximum and the Blade Depth at 5, and this is the cut made by the Cricut Expression:


I have to admit that it was easier to weed out the unwanted parts from the Cricut cut out even though the Silhouette's cutting mat was a lot more sticky. However, the cuts made by the Cricut left a lot to be desired. Just take a look at the two cutouts when they are put aside each other.


Look at the distorted cuts from the Cricut Expression on the  right side:


Once again, the frame on the right was cut by Cricut.

Notice that the cut out made by the Cricut was pretty distorted compared to the cutout made by the Silhouette. 

I am still testing the Silhouette and today I am going to be using the Silhouette to cut out some different weight paper. I'll tell you all about it in my next review post. ;-)


Edit:  Both frames were cut from Make-the-Cut. One using the Silhouette SD cutter, and the other using the Cricut Expression.


You're a Smart Cookie!


For today's project, I made a card with Lettering Delights' Chocolate Chips Cookie graphic set and Make-the-Cut. As this card was made over the weekend BEFORE I opened the box that contained my Silhouette, I  actually used the Cricut to cut out all the paper needed to make this card.


The cookies were cut out using the print-and-cut technique while the shaped base was made using Make-the-Cut's Shadow Layer tool. 


The graduation hat is from Lettering Delights' Class Act graphic set and Stickles glitter glue was applied to give an accent. Joy's stamp from the Yummy Pun set completes this card.


Don't forget that tomorrow is Friday Reader Spotlight so if there are any cards you would like me to feature on my blog, just send it to me (use Contact Form above) or post it to my Facebook page. Every card that is submitted will have a chance to win a $10 Lettering Delights gift certificate at the end of the month.(expired)

Wednesday, March 23, 2011

The Silhouette SD Review (part 2): Print-and-Cut


The one thing that I noticed when I was researching the Silhouette SD was the large number of reviews that mentioned how well it can do Print-and-Cut through the Silhouette Studio software. I was intrigued. Amongst the three cutters that I bought to review, the Silhouette SD is the cheapest ($189 at Overstock.com, and $199 on Amazon.com) but it also has the most positive reviews for Print-and-Cut. That was a major factor that made me decide to buy this cutter.

Even before the machine was delivered, I knew that the first thing that I will have to cut it is a print-and-cut piece. Once taken out of the box, I hooked up all the necessary cables, popped in the Silhouette Studio CD into the CD drive of my laptop and followed the instructions to install the program and register the machine.

That part was easy.

As soon as the program launched and the virtual mat appeared before me, I realized that I missed MTC. :-( All the icons looked so unfamiliar! I took a moment to shake that thought off and forged forward.

Silhouette Studio
  
(Note that the machine can only cut to a width of 8", which means that if you need to cut wider widths, this machine might not be for you.)


I clicked on a few buttons to figure out what they were for and most of the tools were pretty easy to figure out. There are a few tools that I was particularly excited about including a Line tool which I can use to cut a line which at this time, MTC is still unable to do (it cuts a skinny rectangle instead of a line).

After a few minutes of mindless clicking, I headed to youtube and found this video tutorial on print-and-cut. It was very helpful but I found that it had left out some useful tips which would have helped a newbie like me even more.

So here is my video tutorial for the new Silhouette Studio user. Let me show you how I did my print-and-cut with the Silhouette SD:


The doll image that I used is from Lettering Delights' Let's Play graphic set. I printed it on Georgia-Pacific white cardstock (110lb, 150 sheets, available at Walmart for $6.xx) and cut at 3.5" using the YELLOW blade cap. I couldn't have been more impressed with how precised the cut was.


Next, I cut a second doll a half-inch shorter at 3" tall.


I decided to go one step further, I got the machine to cut the inside smaller pieces for layering.


Look at the eyes! They are miniscule! And ROUND! Like circles are supposed to be. ;)


Print and cut with the Silhouette Studio was so straightforward I almost cried at the simplicity of it. I did not spend $500 dollars for a machine that takes up a lot of room and limits what I print to what is available on cartridges. I did not have to do a trial and error placement of paper and no funky adjustments of anything or whatsoever.. This was a FIRST cut on my FIRST try. Print-and Cut with this machine was so easy I felt ridiculous. 

Here is the finished card that I made by printing and cutting through the Silhouette Studio software. The graphics are from Lettering Delights' Let's Play graphic set, the background papers are from the Let's Play Background Paper Pack, and the font used is SNF Playground.

This may only be the first card that I've made with this cutter but I already know that this one's a keeper. I love the compact size and the light-weight. I love how little room it takes compared to the Cricut Expression. I love that there are very few buttons and no cartridges or overlays and most of all I love how it prints and cut. Unless the Gazelle, or the Lynx can do a better print-and-cut job, at this point I'm pretty sure this baby is staying.

(Note that the machine can only cut to a width of 8", which means that if you need to cut wider widths, this machine might not be for you.)

I am still testing the cuts made by this machine and tomorrow I will show you some non-print-and-cut cutouts made by the Silhouette SD.


Tuesday, March 22, 2011

The Queen's Royal Court Design Team: NIKKI SILVIS


Today's Nikki Silvis card was made with her "Tree Love" Collection. I used Lettering Delights' LD Funky Chunky font to type out the sentiment in Make-the-Cut and it was printed on the patterned paper.


Don't forget that I am still accepting entries for The Queen's Royal Court Blog Hop Giveaway. The prize is a stack of gorgeous Nikki Silvis papers. If you have not put in your entry, just CLICK HERE to enter.


Cutter 1 of 3: The Silhouette SD (part 1)


After word got out that the PC-MTC lawsuit had settled, I started receiving requests for recommendations for an electronic cutter that is not a Provo Craft product. Honestly, the Cricut is all I have ever used. I never really cared to find out more about the other cutters that are out there because I was happy with my Cricut.

As a result of the recent settlement, Make-the-Cut is no longer compatible with any Provo Craft machines. Since I have and am still using MTC v.3.2.1 with my Cricut Expression (firmware 2.34), all that means to me is that I can no longer update my MTC or firmware if I want to continue using MTC with my Cricut. If I leave my program and cutter as-is, I  can continue using MTC and my Cricut together so long as I NEVER  update either the program or the machine's firmware. EVER.

In other words, with the settlement, Provo Craft has effectively given me, the Cricut user, an ultimatum: either stick with using the Cricut and cartridges without MTC OR to continue using MTC with another cutter that is not a Cricut.  I can no longer have the best of both worlds. I was forced to choose a side. If I choose to update MTC in the future, I will not be able to use my Cricut with it. If I choose to use my Cricut with MTC, I can never update my MTC. If there should be an update or upgrade, while the other non-Cricut /MTC users are enjoying all the cool new features, I am stuck with v.3.2.1. Forever.

To me, the choice is obvious. I'm an MTC girl but, the Cricut was the only cutter I have ever used. Who am I to recommend any other cutters when I have no hands-on experience with any die-cutting machines besides the Cricut? It didn't take long for me to realize what I had to do. In an effort to give you, my dear blog readers, a fair and unbiased assessment, I decided to pay out-of-pocket, and without sponsorship, for three MTC-compatible cutters that I think would make a possible good replacement for the Cricut Expression.

Out of the list of cutters that I know are compatible with MTC, I decided to get the Silhouette SD, the Gazelle, and the Lynx. The Silhouette SD costs $189 less a $10 coupon on Overstock.com and $199 on Amazon.com. I am aware that Custom Crops currently has the cutter for sale at $159 but I have had a bad experience shopping with their site so that I no longer shop there. 

After checking around for a little bit, I decided to buy the cutter from Overstock.com. I ordered the Silhouette on March 12 and it was delivered on Mar 17. I finally took it out of the box on Monday.

This is the box that the machine was shipped in.


 and here is my new friend.
"Hello! Nice to meet you,."

Look! No carts required!
Seriously, no carts and free designs?

 Here it is out of the box:
The Silhouette SD?

The Silhouette SD unveiled.

Size-wise, the Silhouette is a baby compared to the Cricut Expression.

It is also A LOT lighter. The Cricut Expression weights over 12 lbs while the Silhouette weighs a mere 4 lbs. I can hold it with one hand!

There are only 5 buttons on the Silhouette compared to the Cricut's half-a-million (fine, that 's an exaggeration, but you know that there are a lot of buttons on that silly rubber overlay). 


 To use the machine, the cover has to be lifted up like that:


Here's the blade plunger inside the plunger holder and secured by the blue lock lever.


Here are the other stuff that came with the machine: 2 cutting mats, a power cable, an AC adapter, a USB cable...


 ...Silhouette Studio software, and a $10 download card to the Silhouette Online Store.


The blade for the Silhouette looks very different from that of the Cricut. There is a blade plunger with 3 adjustable caps. The different colored cap is used for cutting different weight paper.


The Blue cap is for thin material like vinyl or vellum. The yellow cap is for medium thickness paper, while the pink is for thick paper such as cardstock.

Here is a short video for you:

---
My first impression of the cutter is EXCELLENT. I love how small it is. Even hubby said it was "So Cute!". I really like how light it is too. 4 lbs! Even my groceries weigh heavier than that! Because of it's small size, it takes up a lot less room than my Cricut Expression. I like how it looks too. The 5 buttons is a refreshing change from the Cricut's multi-button overlay. So minimalist! The best part is that it does not use any cartridges at all. Not even a dummy one like the one we have to leave in the Cricut for MTC to work with it.


This concludes my first post about the Silhouette SD. In my next post, I will show you my first cut with the Silhouette SD. 

Stay tuned.


Sunday, March 20, 2011

The Queen's Royal Court Blog Hop: NIKKI SILVIS


Good Sunday morning, everyone! The Scrapbooking Queen and I have partnered with 8 super talented crafters to bring you The Queen's Royal Court Design Team. Together we will be showcasing some of the hottest brands on the paper-crafting scene. We're kicking off with our first sponsored blog hop today. 


Welcome to

The Queen's Royal Court Blog Hop
featuring 
NIKKI SILVIS's SCRAPBOOKER


Here are designers in the Queen's Royal Court:


Raven


If you have arrived at this blog from Jenny's Crazy About Cricut, you are on the right track. If not, just click here to start the hop from Theresa's The Scrapbooking Queen blog and keep hopping until you're back here. Check out all the fun things that you can do with Nikki Silvis products and put in your entry to win some of her gorgeous papers. There are ten of us on this hop which means that you have TEN chances to WIN! By the way, if you should lose your way on the hop, just come back here and refer back to the list above to get back on track.

We will be using Nikki Silvis' papers for our projects this week and this is my project for today:


The card measures 6" x 4.5" and all the printed papers are from the "My Friend Birdie" Collection. The kraft cardstock is from Recollections. 


For the sentiment, I used Lettering Delights' LD Woodland font and cut out the letters at a height of 0.5" using Make-the-Cut. As the letters are relatively skinny, I cut them out on white contact paper  instead of cardstock. That way, I didn't even need to deal with gluing all the letters down. Can we say instant stickers? Yeah, Baby!

To transfer the letters from the mat to the paper, I used the trick that I mentioned in this post.

Putting this card together was super quick and super easy because all the patterns already co-ordinate. I didn't even need to dig through my giant mountain of papers for matching pieces. By the way, the decorative edge of the blue paper on the left was made with Martha Stewart's Cherish border punch.

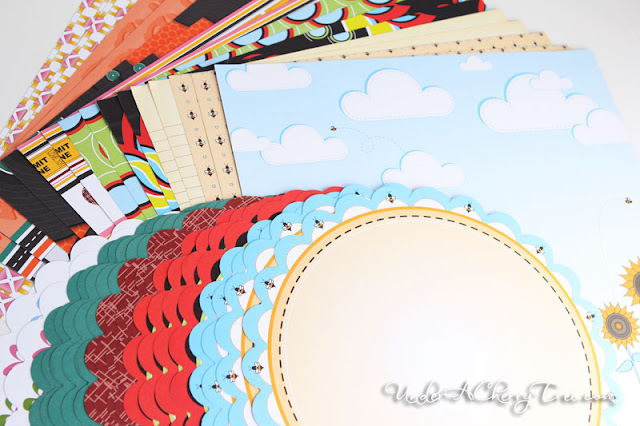
Now let's check out the goodies that Nikki Silvis has sent me for the hop's giveaway:


Do they look yummy or what?! No need to drool because you just might be the ONE lucky winner to get them.

Here's how to win:

You must be a follower to enter in the giveaway. If you are not already a follower, just click on the "Follow" button on the right.

Leave ONE comment on this post and tell me what you would make with the papers if you win.

Make sure that you leave your email address or any other form of contact so that I may inform you if you win.

Entries to the giveaway will be accepted from now until March 26th 6:00 PM PST. The winner will be chosen by RANDOM.ORG and announced on Monday, March 28, 2011.


Your next stop is Kassidy's Inking It Up Crazy. Click here to go to Kassidy's blog.