

After a disappointing experience with Silhouette Studio version 3 (see my review HERE), I was apprehensive about using version 3.1.417 which Silhouette America had just released a few days ago. My curiosity over their new PixScan feature finally brought me over the edge so I went ahead and downloaded Silhouette Studio v3.1.417. I was not confident that Silhouette has fixed all the issues that made version 3 hard to use so I installed the latest update on a spare laptop.
For those of you who do not follow me on Facebook, the following is a recap of what I experienced while I was testing the software. For the test, I used Silhouette Studio Designer Edition v3.1.417ssde on a Lenovo laptop running Windows 8.1.

1.
PRO: Pattern-Fill is fixed! I can drag-and-drop my Lettering Delights (LD) papers from an external folder and into the shapes again! YIPPEE!!
CON: The short-cut for Ungroup no longer works. CTRL+U does not ungroup the shapes anymore. In fact, pressing down on the CTRL key activates the feature for transferring properties of a shape.
Also, previously in version 2, I can use either CTRL+drag or ALT+drag to copy a shape. In v3.1.417, I can no longer use CTRL+Drag for that but thankfully, ALT+Drag still works. (Thank you, Facebook fan Rachel Davis for the info!).

2.
I found the PixScan button! It's the 3rd button from the left on the top menu bar. :-) I don't have my PixScan mat yet but I can't wait to try out the feature. Click HERE for a video from Graphtec UK that shows how PixScan works. Thanks goes to Linda for sharing the link!

3.
I thought it would be a good idea to test the software by making something with it. That way, I will use most of the tools that I usually use in the program. After some thought, I decided to make some new credit card size notecards with LD's Get Happy graphic set and papers. You can find the tutorial for a similar project HERE.
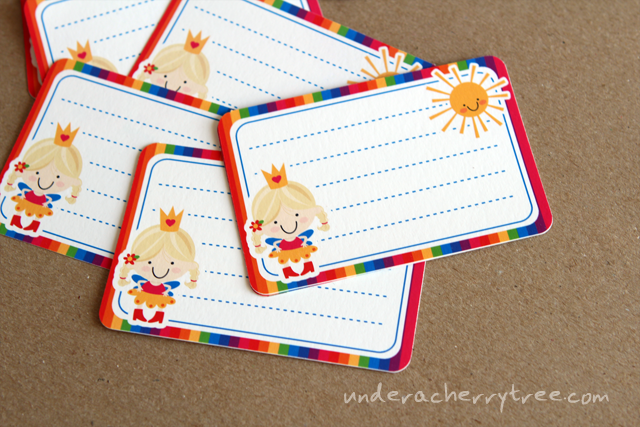
My first print-and-cut project with v3.1.417 turned out to be surprising smooth-sailing. I was quite happy that I didn't have much trouble at all. There were some minor things that bother me - for example, I don't like how the extra cinematic effects cause a lag time when I switch from one tool to another. Also, the user interface is a little bit different from version 2 so I had to figure out where some of the tools/buttons are. Despite that, I was pretty pleased at what I was able to accomplish after installing the update.
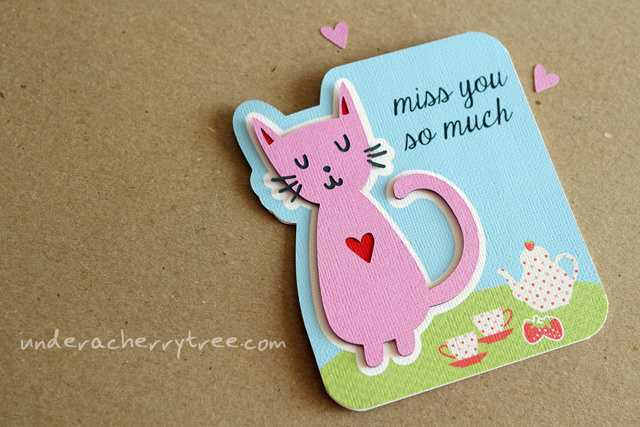
Encouraged by the success of my first project with v3.1.417, I decided to go ahead and make something else. A shaped card is one of the things that I make very often with Silhouette Studio and so that was exactly what I decided to make next.

4.
CON: Bring-to-Front and Send-to-Back do not work for LD SVGS and Cut Its.
I hit a snag almost as soon as I started on the shaped card. No matter what I did I was unable to use the Bring-to-Front or Send-to-Back commands on an LD design. Bring-to-Front/Send-to-Back work if I use them on shapes from the Silhouette store or on those which were drawn in Silhouette Studio, but I can't get them to work for LD's cutting files.
Facebook fan, Angelica, suggested some workarounds. She said,"I tried to import one of the SVGs into Make-The-Cut and exported as an SVG, then imported the new SVG into SSDE. I don't know what MTC did to make it work, but now I can send to back!"
Beth also mentioned that she "used the "right click-cut" feature, then "right click, paste in front" and that worked." on a non-LD file.
Stacie says that she uses the Layers feature to move the shapes so I thought I would take a peek over there to check it out.

5.
CON: Layers feature is still unusable.
Many of us were very excited when we found out that version 3 came with a Layers feature. It was something that we had wanted for Silhouette Studio for a long time. Unfortunately, the excitement turned into a huge disappointment when we discovered that the feature was messy, unintuitive, and hard to use. It has been 4 months since version 3 was first released (April 2) and I was hopeful that Layers would have been fixed by now. Sadly, I am finding that the feature is still a mess. :-(
With reference to the screenshot above, 1 (red circle) refers to all the shapes/layers that made up all the images on the mat. Notice that only the three "Polygons" are highlighted even though all four images on the mat were selected.
2 (blue oval) points to an image that I had brought onto the mat but had already deleted. Even though the image is no longer on the mat, the Layers window was not automatically updated. I had to delete the ghost layers from the Layers window in order to make it go away.
In my opinion, the Layers feature is not usable unless you only have a few simple shapes on the virtual mat. The more shapes that you have on the mat, the harder it is to tell them apart from the Layers window because they are all labelled with the same names. For example, the names of the basic shapes are the same no matter if it was a square, a rectangle or a circle. They are all labelled as "Polygons" in the Layers window. Any LD shapes that I bring onto the mat is named "Layer 1" even though they have different file names. If I bring more than one LD svg onto the mat, I will not be able to easily tell them apart in the Layers window since they are all shown as "Layer 1".

Because the Bring-to-Front/Send-to-Back commands did not work properly with the LD svg, I had more trouble making this shaped card than I did with the print-and-cut notecards. I was willing to give v3.1.417 a chance and even though I think that it is a huge improvement over the earlier version 3s, there are still a lot of kinks that Silhouette need to iron out.
6. Conclusion
I have only began to test v3.1.417 by using the basic tools that I use most often in Silhouette Studio. There are still many tools and features that I have not tested. At this point, because of the bugs that I have discovered, I can't give you the all-clear to download and install the update. Silhouette did fix many bugs from the earlier version 3s but I am still hearing about other bugs in this version that I have not personally come across yet. For example, April is having trouble with the update not showing all her fonts while Candi, a Mac user, still can't open an image etc by dragging/dropping to the Silhouette icon.
If you want to give the update a try, click HERE to get the download. Install at your own risk and if you find that you don't like it after all, just click HERE for a tutorial that will show you how to uninstall the update and revert to the Legacy version (a.k.a. version 2.9.45)
If you are already using version 3.1.417, I would love to hear what you think of it. Please share your thoughts in the comments below or join our discussion over on my Facebook page.
For those without Make-The-Cut or just like working with Inkscape, Inkscape can also "convert" (for lack of better term) the LD SVG's into a workable form with Silhouette Studio V3.
ReplyDeleteHi Jin!! Thank you for share this review with all of us!! About the layers, in other designer sofwares like photoshop, the layers can be renamed, As you add layers, they shown as "Layer 1", "Layer 2", "Layer 3", but you can easily renamed as you want to remid you the thigs you have in each layer (border, fill, flower center, etc). And if you erase something in one layer, the layer will stay , unless you delete the layer. Is like a clear sheet in a folder, you can erase or dettach the things of the clear sheet, but the sheet will stay unless you put it out of the folder. Hope this help to understand the layer function... I think I will update the version to try it...
ReplyDeleteI don't use make the cut, so the problem the LD svg's is a bad thing for me...
Thanks again for all your help!!
Jin...RE: Layer Labeling: You can rename the layers to suit your needs. Select the layer (polygon label) you want to change and right click. 'Rename Layer' is one of the options in the drop-down menu.
ReplyDeleteHi Jin
ReplyDeleteThanks for the update. I refrained from ever downloading
in April. I have to wonder when companies put out "New-Improved"
versions who they were improving for? The program works quite
nicely to begin with why improve it? I guess I am not savvy enough to
require a lot of bells and whistles in my crafting so I thought the program
worked great to begin with. Just saying….
Hi Jin, In your opinion, has version 3.x added any new and useful functionality that was not in the availablee in the 2.x versions? I don't make a ton of projects, but I haven't seen anything [yet] that 3.x can do that I can't do in my current 2.x version.
ReplyDeleteAt this point in my testing, I would say no. I am looking forward to getting my PixScan mat and giving PixScan a try. Unless PixScan wows me, I would say that you're probably better off with v2 because there is no added value in using v3. Stay tuned as I will be updating the blog with more v3 test results soon. :)
DeleteThanks, I'll stay tuned! I still don't quite understand PixScan. Seems like I still have to scan, import, and trace to add cut lines...which doesn't appear to be much different from the current method (only the scanning method changes). I'm curious to find out if scanning with the PixScan software streamlines the process (if that is possible). Looking forward to see what you find out!
DeleteHello, I just wanted to share my experiences with the layers, cut by color, and cut by line color. I absolutely love them all. You can easily add layers, re -name them and name the parts of the cutting file you are placing in the layers you named. Recently, I had a paper piecing project which used all sorts of various pieces of colored cardstock. It was wonderful to be able to place them all on top of each other and just click on the next layer to cut the next color of cardstock. This also worked well with the "cut by line color". Layers can easily be named to whatever we want. It works similar to naming layers in Photoshop. I will never cut any other way when using multiple colors of cardstock. It rocks! Hugs to all, Debbie
ReplyDeleteI've been testing the PixScan software and mat for the past 3 or 4 weeks.I've been frustrated using the scanner portion, but have found the camera easy to calibrate. The camera image popped right into place, I auto traced and cut. The only problem I had when doing a second cut on another image is some white edges on the images on the right sided of the page. The first camera test was on a paper doll and clothes. They came turned out wonderful. I totally love the way we can now use those mounds of scraps we manage to collect over time. All I had to do, was take a picture of some scraps I had set on my page, auto traced them, selected the shapes I wanted cut out of each scrap of vinyl and card stock, used the nesting tool to nest the shapes in the various media and it was like magic to see all of those shapes nicely nestle into each part of the media I selected. What a great way to cut fabric, vinyl, cardstock scraps and more.
ReplyDeleteI tried the Pix Scan mat and have had mixed results. I tried cutting some patterns out of pattern papers and while some cut perfectly, others did not. It would appear the scanning needs a high contrast to read in order to get a nice trace. I tried cutting clouds which were on blue paper and only about half of the clouds were even recognized. I also tried cutting a pattern paper which had lined drawings and I would guess about 80% of the patterns were recognized. I am sure with multiple traces I could get a better result, but overall, I think it's best for nice clean high contrast images.
ReplyDeleteThank you for your update! I have upgraded, and found that the latest update lost some functionality:
ReplyDeletePage settings: in order to print on other than default size pages, I have to set up the page size in page settings, then go to the file menu and set up the page size again, THEN make sure it is the correct page size and orientation when you hit "send to printer".
Arrange images: in order to move images to the front I have to cut them (cmdX on a mac) and then paste them back onto the page over the images I want behind them.
Silly.