

It's almost the end of the school year and already the kids are talking about Summer playdates. The girls always forget to get their friends' contact info before they leave for their vacation so I made them some Playdate Notecards. I'm hoping that they will remember to hand these cards out to their friends and have them write down their email addresses or phone numbers.

These credit-card size notecards are super easy to make. I started by drawing a 3.375" x 2.125" rounded-corner rectangle with Silhouette Studio Designer Edition (version 2.8.16d).

Initially I used the Internal Offset Tool to make 2 smaller rectangles but I didn't like how the corners looked. I decided to use the rounded rectangle tool to draw two smaller shapes and I liked those corners better. I didn't calculate the dimensions (I just eyeballed the sizes) but they ended up measuring 3.175"x1.875" and 3"x1.7".
Once the template was ready, I dragged-and-dropped the textures into the rectangles, and positioned the pet graphic over it.

I have always avoided placing any part of the image in the shaded area of the virtual mat because I was under the impression that that was a no-cut zone. I thought that the Cameo would not be able to cut anything that was placed inside a shaded-area. I didn't want to leave a blank spot and waste my paper so I arranged and positioned 8 cards on a page. One of these cards fell in the shaded area so I expected that the machine will cut only the portion that was outside the "no-cut zone", and leave the lower left corner attached to the paper. I was prepared to finished cutting the card out manually.

Imagine my surprise when I saw that the Cameo had cut the whole thing out! Despite leaving a part of the card inside the shaded area, the machine cut all the cards out anyway. Cool!


 |
| I didn't know that the Cameo can cut this close to the registration mark! The image was in the shaded/no-cut zone! |
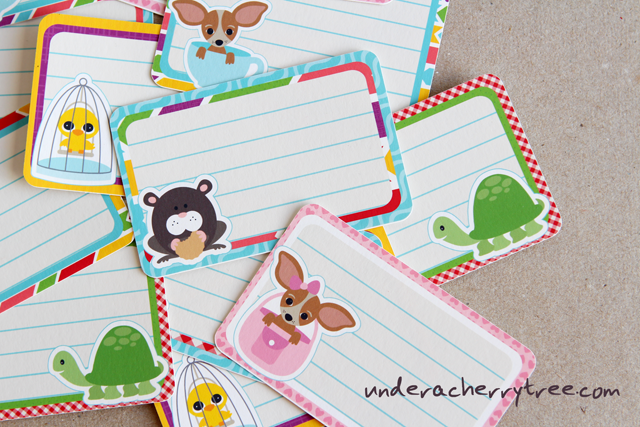
Here are the finished note cards. They looked even cuter after they have been cut out!

By the way, unlike my stationery sets, I did not draw in the lines on the cards. The Pet Shop Stop paper pack includes a note book paper pattern so I just used that instead. I increased the pattern to 300% so that there is usable writing space between the lines.

Besides playdate cards, these are also great for lunch notes.
In case you are interested in making some of these notecards, here's a video tutorial for you. If you are following this blog via the Feedburner newsletter, you can find the video at this link:
http://youtu.be/qWPmwB0bia0
Files used:
Pet Shop Stop graphics set
Pet Shop Stop paper pack
Love is Sweet background paper (pink; for doggy-in-purse card)
LOVE this tutorial! Thank you so much for slowing it down for us newbies. This was really easy to follow. -Jamie
ReplyDeleteLove this too! Your directions are so clear and concise. Thank you!
ReplyDeleteThank you for pointing out about the shaded area on the virtual mat. I have always placed things to avoid that area too believing the same as you did about it cutting!
ReplyDeleteLove these cards, too cute! I'm off to make some for my daughter. And thanks for the info on the no cut zone, I thought the same as you.
ReplyDeleteLove it! thanks again Jin.. you are mahvalous :)
ReplyDeleteHi, the shaded area is better to leave blank due to it may causing de cameo detect the register mark wrongly (especially for those image is dark color), non cut area is outside of the red line... ^·^
ReplyDeleteGreat video!
ReplyDeleteVery cute idea and your instructions are
right on target.
Thanks Jin
Oh you take the mystery away-this always looked so hard! Super project!
ReplyDeleteI have learned so much from you and appreciate you SO much. You make the cutest things and make the tutorials very easy to follow. I pray that God bless you big time :)
ReplyDeleteWhat kind of cardstock do you use? When I made these, the cards felt too floppy. I would like a really stiff paper. Suggestions? -Jamie
ReplyDelete