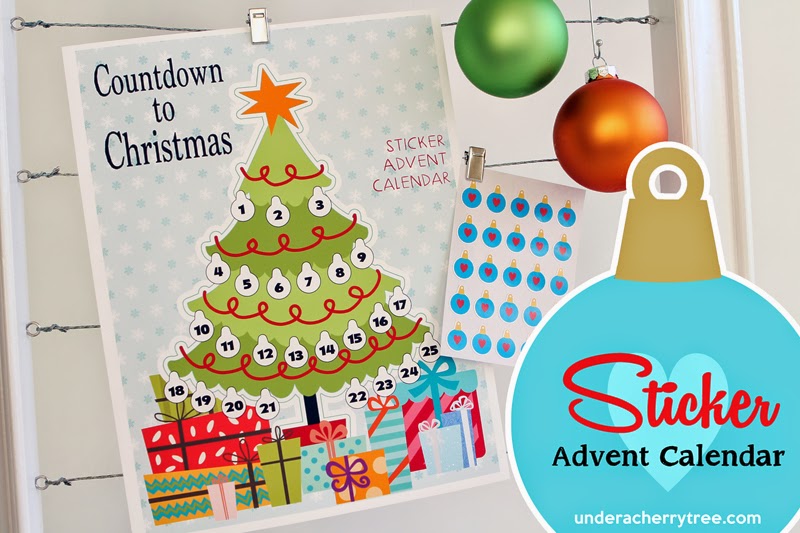
One of my favorite things to do with my Silhouette Cameo is to make stickers. In my opinion, "Print-and-Cut" is the best feature of the Silhouette software and machine. I have made cards, bookmarks, buttons, and a ton of stickers with it. Today I will share an another project that I have made using the print-and-cut feature- a Sticker Advent Calendar! :-)

Using Silhouette Studio Designer Edition (v.2.8.16d) and several different Cut Its (SVG) and Graphic sets from Lettering Delights, I came up with this:
Once the design was completed, I printed it out (using my Canon printer) on a letter-size cardstock.
To make the stickers, I did this:
I could make up to 4 sheets of ornament stickers on a sheet of letter-size sticker paper. I used my New Cameo to first "kiss-cut" the ornaments so that the stickers stay on the backing paper. The settings that I used (Blade 1, Thickness 8, Speed 8) were considerably lower than what I had previously used to cut stickers with my original Cameo.
To cut out the 4 sticker sheets, I used the settings of Blade 3, Thickness 15, Speed 10.

If you have never made stickers with your Silhouette cutter, I hope that you give it a try. It's fun and easy! You can make a sticker advent calendar like the one I just showed you, or make sticker labels like the one in THIS post. If you need a sticker tutorial, just check the posts HERE, and HERE.
---
Files used:
Christmas Tree: Christmas Goose Cut It (SVG)
Ornaments: Little Angels Cut It (SVG)
Background: Blooming Christmas paper pack
Fonts: LD Oz ("Countdown to Christmas:)
LD Simple Things ("Sticker Advent Calendar")
LD Mon Cherie (numbers)
Presents: Christmas Goose graphic set,
Party Owl Night graphic set,
Ice Princess Party graphic set,
Claus Applause graphic set,
Party On Cut It (SVG)


oh my gosh!! you are a genious!! I love this :-)
ReplyDeleteLove this! It's so hard to find good cut files for advent calendars!
ReplyDeletehttp://partnparcelstudio.com/