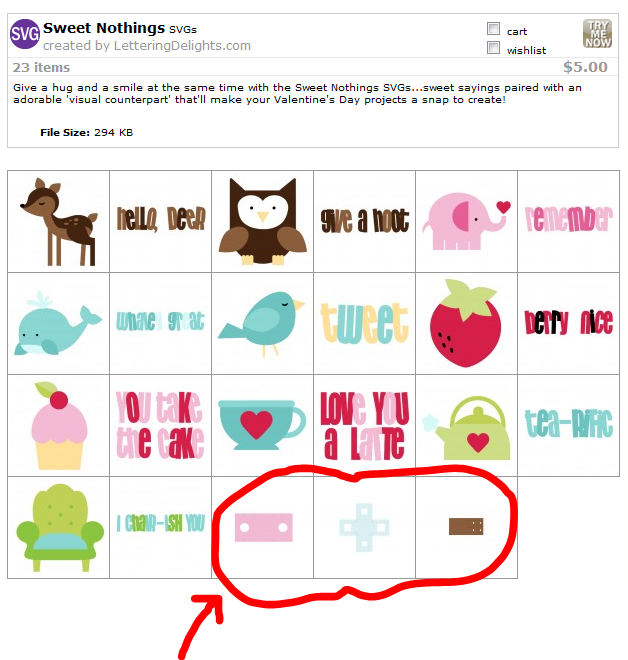
By now you might have seen Lettering Delights' Sweet Nothings SVG set. If you take a closer look at the cuts that are on it, you might wonder what the last three files are for.
The three files are actually cut files for some really fun and very unique-looking cards. Let me show you how to use them.
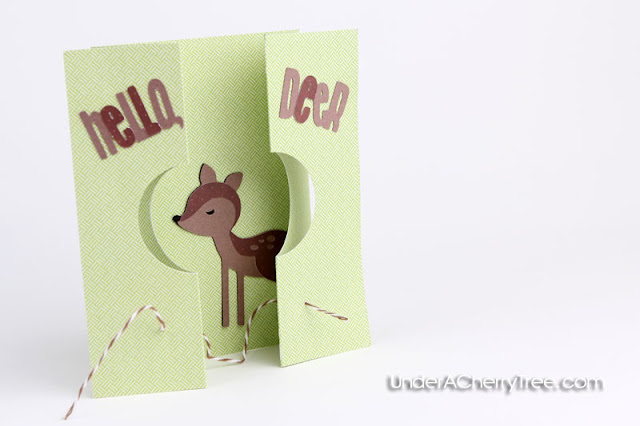
File no. 21 opens like a bi-fold card with a circle cut-out in the center. I used Make-the-Cut to make this "Hello Deer" card. This card is so easy to make! Lettering Delights has already done the hard part by coming up with the unique design of this card. All that I had to do was to put a focal image and the greeting. By the way, the deer and the greeting are also from the Sweet Nothings SVG set.
File no. 23 works very much like a frame. In fact, it would be fun to use it like a frame. Can you imagine putting a photo in the center instead of a cutout? How cute would that be?!
Finally, file no. 22 is a window card where you can open all four windows to reveal a secret message or picture inside.
Oh, imagine the possibilities you can have with these cards! If you are tired of the same-old rectangle card, have some fun with these instead! What I have shown you are just some samples of what you can do but there are so many other ways to play with these cards. Make your card stand out from the others, just use Make-the-Cut with the Sweet Nothings SVG set! You can get it by clicking here.


Jin, Thanks SO much for demonstrating this set. I've got it, but really didn't look hard at those last three cuts. And they are MARVELOUS. Lettering Delights is so lucky to have you to inspire us. :-)
ReplyDeleteThese are adorable! My fave is the one with the four little flaps! I sent you an email with my Animal project links.
ReplyDeleteLove these cards! How unique.
ReplyDeleteJin, where do you get the colored string?
fsclassen at gmail dot com
How cool! I wish I had known when the files were still on sale! LOL ;-)
ReplyDeleteI was definitely wondering what those shapes were...
Wow, awesome cuts! Thanks so much for showing how they work. Your cards are terrific.
ReplyDeleteCute cute cute
ReplyDeleteOMGosh....so adorable...I promised I wouldn't buy anymore for a month and now look what you have gone and done. I need to win a challenge....I'm trying...haha
ReplyDeleteI just found your blog & all I can say is WOW! I see lots of things on Lettering Delights & wonder if I'll really use them, but you really help me see all the possibilities. Thanks for all your inspiration!
ReplyDeleteJennifer
jin, these are so cute!
ReplyDeleteliz :o)
Hi Jin! Thank you for the inspiration! I'm going to add these files to my wish list. They are perfect for so many occasions! You are so generous with your gifts that I hesitate to ask, but would you be willing to do a tutorial on the four window berry card? I'm a newbie who has learned a lot from your other videos. I'm sure you're swamped but that card is soooo cute and I worry that I might mess it up without your expert advice. Thanks for considering this request and thanks for all you do to teach and inspire.
ReplyDeleteThanks, everyone. :-)
ReplyDelete@Felicita, I bought the twine from The Twinery. This is their website:
http://www.thetwinery.com/
@Lisa, I will definitely be using the window card base to make something and I will include more details or pictures. :-)
Thanks for posting this! So hard to tell what these are just looking at them in the set. LOVE the last one with the four little "doors". Putting this one on my wish list! :)
ReplyDeleteWell, I must have this now. LOL. Thanks (?)for the enabling!!
ReplyDeleteThese cards are so unique, I love them!! Shh, don't tell my DH!
ReplyDeletedefinitely going into my cart.
ReplyDeleteHi Jin,
ReplyDeleteI bought it after seeing the cards you made. I have a questions...do the cards need to use a larger paper than 12x12 or should I re-size? The one frame one was just a touch over the 12x12 and the one you used for the deer was alomst 14 wide. Am I doing something wrong...I'm using 72 DPI.
Thanks!
I never would have guessed what the last 3 were for...Thanks for telling us what they are. Very clever card shapes.
ReplyDeletequilt 4 fun 2 at hot mail dot com
Hi, Jin,
ReplyDeleteThanks so much for figuring out what those last three files are for. I have bought lots of cut files from Lettering Delights because I saw them on your blog! I'm very often perplexed about what some of the Lettering Delights files are for. I always wish they would include a photo or diagram of what the finished project should look like, or at very least wording telling what it's supposed to be Do you think you could use your influence to try and get them to include a picture, diagram, or information about what their files are supposed to make on the PDFs? I know they took your advice on providing the "backs" of the paper doll files and they routinely include the backs now. Would you try?
Thanks!
Evelyn
evelynholmberg at mac dot com
mylittlecraftblog.wordpress.com