

In last week's tutorial, I showed you how to use vinyl to make a decorative wall decor piece with the Lettering Delights Bleu Basil Cut It set (svg), and your Silhouette Cameo. Today's tutorial will demonstrate the use of that same set to make a card version of that project.

For this project, you will need:
1 piece A2 size card (4.25" x 5.5")
1 piece 3.5" x 4.75" patterned paper
1 piece frame cut out (3.5" x 4.75", inside rectangle 2.75" x 4.0")
1 sheet transparency film
Foam tape
Double Stick tape
Silhouette Cameo or Silhouette SD
Silhouette Studio Designer Edition (or Make-the-Cut)
Import the Bleu Basil svgs onto the virtual mat in Silhouette Studio and re-size each image to 3" tall. Use the rectangle tool to draw a frame for the image. Cut the frame out with your Silhouette cutter. See picture below for dimensions.
Flip the images horizontally before sending to print.


Print the images onto transparency film and cut down to size (3.5" x 4.75").

Adhere the frame to the front of the printed transparency with double-stick tape.

Position foam tape on the back of the printout, and behind the frame. Adhere to patterned paper. At this point, it should look like this:
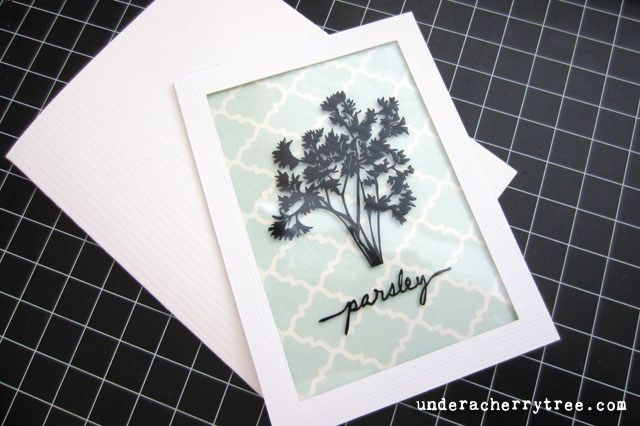
Optional: for even more dimension, use foam tape to adhere framed picture to the card base. Personally I prefer using double-tape as the foam tape makes the card a tad too bulky for my liking.

When the framed art is adhered to the card base, the project is done!

This project is straightforward but the results look really good. Flipping the image and printing it on the back of the transparency makes it look like it has been put behind a glass frame.

When using transparency film, please make sure that you have the correct film for your printer. Using one that is not compatible with the printer may cause poor results or worse, possible damage to the printer.

The patterned papers that I used for this project comes from the Lush Blue Collection by My Mind's Eye.

Even though I like last week's Bleu Basil Wall Decor project a lot, it is simply not possible to send a piece to each of my friends. Today's cards are a good alternative. I can make and put these cards in the mail and my friends will get to enjoy the Bleu Basil as a framed art too.

I hope that you've enjoyed today's tutorial. If my project has inspired you to make your own wall art cards, feel free to post a picture of your work to my Facebook wall. I would love to see how yours turned out.
Have a great day!
WOW!! These are beautiful! Thanks for sharing the tutorial!
ReplyDeleteOn my list of want to tries :)
Have a GREAT Wednesday!
Gorgeous card ideas. Thank you for sharing x
ReplyDeleteAmazing project, Jin. Love the simplicity of the black and white.
ReplyDeleteThese are beautiful Jin! You are just simply amazing!
ReplyDeletegettincraftystarkie.blogspot.com
LOOOOOVE this!! So generous of you to share!!! Thank You!
ReplyDeleteYour cards are beautiful...a great idea to be able to send and be used as a framed mini.
ReplyDeletequilt 4 fun 2 at hot mail dot com
Congratulations for being highlighted on Tip Junkie! Well deserved!
ReplyDeleteHugs,
Carmen L
Thanks, Carmen! :)
Delete