I was browsing online yesterday when I came across a wedding supplies site. One of the things that caught my eye were some place cards that the site was selling for a buck each. Each card is in the shape of a butterfly and it sits on the rim of a glass. I chuckled as I said out loud, "I can do that with MTC!"
And so I did.
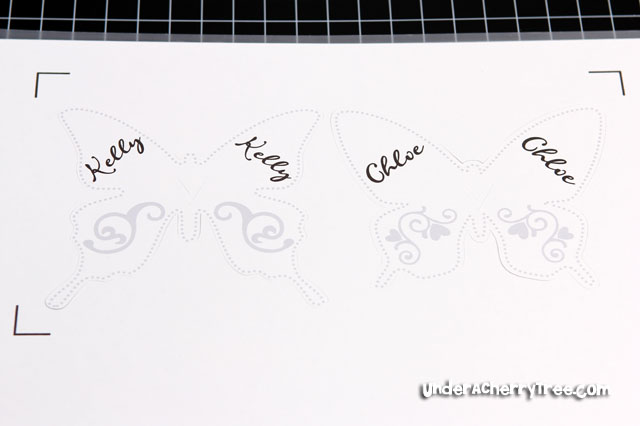
I used Make-the-Cut, and the new Silhouette plug-in (beta) to print and cut these place cards with my Silhouette SD cutter. Just for fun, I used 2 styles of butterflies and they are both from Lettering Delights' Oh Hello Flutter SVG set. The flourishes are from the Love Flourish SVG set while LD Cursive was the font that I used for the names.
I must confess that while the Rhinestone feature is very popular amongst MTC users for setting rhinestones, I've never used that. I don't decorate t-shirts very often and so I never saw the need to use the feature. Until today. I realized that I don't have to cut out all the little circles. The design of the rhinestones template look really good as a print too!
Even though the plug-in is in beta, I already love it! Look at the picture above and see how nice the cut of the butterflies turned out for the print-and-cut!
To make the butterflies sit on the rim, I made a notch by layering a V-shape over each butterfly. I tried using a letter V from a basic font but the butterflies didn't quite sit right so I decided to make my own "V" by Boolean-Joining 2 triangles. I made the letter so that the bottom is pointed and the top is tapered. If you have a font where the letter "V" is already designed this way, you can just use that.
 |
| This butterfly is slightly different from the one on top of the page. Can you tell the difference? |
I don't have any friends who are getting married any time soon but I'll be making more of these anyway as they do not have to be used for just a wedding reception. My girls actually love these butterflies a lot and I'm totally going to make these for a summer tea party. I think that they will look super cute sitting on the kiddie cups too, don't you? ;-)


I LOVE IT!!!!Thank you for all you do.
ReplyDeleteAwesome awesome awesome..... turned out super..thanks for the tutorial
ReplyDeleteReally nice. I like it a lot. Thanks for the mini tutorial on how you did this.
ReplyDeleteWhat a terrific idea!! TFS Jin!
ReplyDeleteHugs...Kathy
How amazing, Jin they are just fantastic. The print and cut features just scare me I haven't even tried it yet! The rhinestone dots do look great printed too... great idea!
ReplyDelete-rwk
rwkrafts.blogspot.com
I absolutely LOVE LOVE LOVE this!
ReplyDeleteBack in April I made some butterflies like this for a friend who was launching her new home party business called, appropriately enough, Flutterby Frills. The were lots of fun to have at the kick-off party. We used them on the rims of glasses and on placecards and in a flower arrangement. Totally feminine!
ReplyDeleteGreat idea...
ReplyDeleteGreets Sabina
These are BEAUTIFUL and very creative :-)
ReplyDeleteoooh .Jin they are just beautiful...such a classy project..I still have not tried the PNC with my Cougar I am a slow learner.
ReplyDeleteLove it! I also love how you crossed out cricut and wrote silhouette :) I just ordered mine, can't wait to get it.
ReplyDeleteSuper cute Jin!! I only have the Cricut, so I am figuring out Cut and Print, but I love these.
ReplyDeleteSuper cute!!! I love this idea. Thanks for sharing. My sister is planning her wedding for some time next year. Whatva beautiful idea. TFS!
ReplyDeleteJamie
Oohlalapaperie.blogspot.com
Super duper great idea Jin! thanks a lot but.... i do know how to use MTC, could you, would you make the tuto for Silhouette? plssssssss
ReplyDelete