

Yay! I have a new video tutorial for you! This time I will show you how you can use the print-and-cut feature of your Silhouette Studio program to make these uber-cute mini notecards. I like to put these cards into my kids' lunchboxes as a surprise but my kids also love them for writing little notes for their friends or even as their own "namecards".
Once you are ready to print-and-cut the cards out, just click on the "Send to Silhouette" button and follow the instructions on the screen to print the page out and cut with the Cameo (or SD).

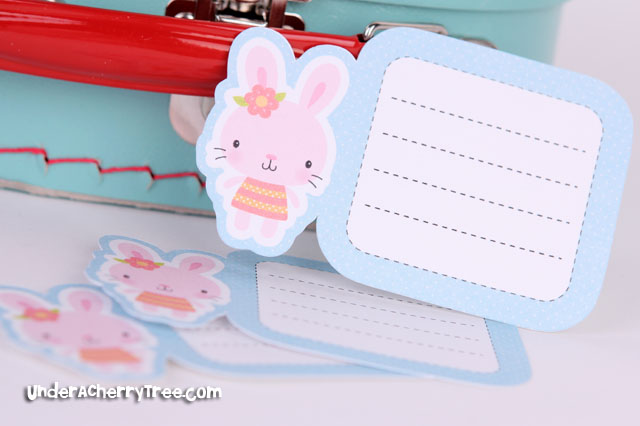
These are the same notecards that were shown in tutorial. This is how they look like when they are all cut out.

I used the new Nancy Kubo Hunny Bunnies Graphic Set and Hunny Bunnies Background Paper Pack to make these notecards.
I am not including the written instructions for this tutorial because the steps are fairly straightforward. There are just a lot of Group/Ungroup and Align here and there.
If you enjoyed and learned something from this tutorial, please click LIKE on the button below so I will know if I should make more of such tutorials. Also, if you have any feedback or questions regarding this tutorial, please comment below. I will use your feedback when I plan for my future tutorials.
One more thing, if you use this tutorial to make your own notecards, please let me know. You can email me (jin@underacherrytree.com) or post your picture on my Facebook wall. I would love to see what you made.
Happy Cutting!
are you kidding:-) I am so excited when I see you have another tutorial!! they are always great and I learn so much, thanks for taking the time to do them!
ReplyDeletei just love your tutorials, im a newbie at silhoutte, can you do a very basic tutorial of how to start to using the machine?
ReplyDeleteThank you soo much for your great tutorial! You can explain everything so good! So I can learn more and make something creativ!!!
ReplyDeleteHi, Jin! Thanks for the tutorial! I ran into some trouble at the 5 min. 12 seconds point in the video. I'm hoping you or someone can tell me where I went wrong. I am using the SVG File No. 5 from the LD Totally School collection. It's the one of the frog holding an apple. When I get to the step where you weld the outer offset of the frog and the note card, it turns both items green when I click "weld". Any ideas on what's causing that?
ReplyDeleteThank you so much for your tutorials! I just got my Cameo and I'm learning so much from them!
Nevermind! I figured it out! I guess I didn't ungroup it first before I tried to weld it. Duh! I'm learning though! :)
ReplyDeleteThank you! What an awesome tutorial!
ReplyDeleteYou are so darn clever! I'm going to use this idea for shaped recipe cards. And I live for you tutorials, please keep it up.
ReplyDeleteJin, I absolutely love it when you post videos! I always learn so much from watching. Even though I've done print and cut before, I always seem to learn something new! Thank you so much for sharing your talent!
ReplyDeleteJin, I made some of these and posted a photo on your Facebook Wall. Thank you SOOO much for your video tutorials! They are awesome!
ReplyDeleteI don't see your cards on my wall, Crafty Starkie! Can you post it again, I saw them on your blog and I thought they were super duper cute! <3 :-)
DeleteOh I forgot to mention in my previous comment that I posted a blog about this.
ReplyDeletegettincraftystarkie.blogspot.com
Thanks everyone for commenting! It really helps to know if my tutorial is helping anyone at all. Thanks for taking the time to leave your feedback! :-)
ReplyDeleteI love this project! has to be one of my faves, You do amazing work!
ReplyDelete<3 Pam MzLavr2sCreations@live.com
Already a follower and have been for a while..
ReplyDelete<3 Pam
Thanks for another great tutorial! I have learned a few tricks that I was struggliing to figure out on my own. A newbie to my Cameo, so your tutorials are so helpful. I wouldn't be able to use it to its full capability without your help! Thank you!
ReplyDeleteWhat a great tutorial! I love this idea and will definitely make some. Thank you for the wonderful tutorial!!
ReplyDeletethanks for the video
ReplyDeleteThis comment has been removed by the author.
ReplyDeleteJust got my Cameo last week and I am so enjoying your tutorials, thank you so much!!
ReplyDeleteThank you for the great tutorial. I have just started using the Studio software on my old Craft Robo and learnt so much from this tutorial. I used one of the notes I made on a scrapbook page I have posted here http://scrapinannies.blogspot.com.au/2012/07/july-page-maps-sketch.html
ReplyDeleteI will now have to do more of your tutorials...
Thanks for the tutorial. You've done a great job. One question for you, what type of paper are you printing on? When I've tried print and cut, I'm using double sided matte photo paper but it sticks really bad to the cutting mat so I actually haven't cut anything that I've printed yet! Any tips on what paper to use and the stickyness of the cutting mat? Thanks!
ReplyDeleteFor these notecards, I used the Georgia Pacific White Cardstock from Walmart. They are not a heavy cardstock but is very economical and work well enough for these kind of PNC projects.
DeleteHi again,
ReplyDeleteI'm trying to get to this link you posted, but it's not opening up. What file format are these in? I really liked how you so easily just placed the images and background into the Silhouette.
I used the new Nancy Kubo Hunny Bunnies Graphic Set and Hunny Bunnies Background Paper Pack to make these notecards and you can get them by clicking
Both the graphic sets and the Paper Pack are in .PNG formats and that's what I used. :) If you have LD SVGs, you can also print-and-cut with them because LD's SVGs come embedded with colors.
DeleteThank you for such a speedy response. Much appreciated! Enjoy!
DeleteHi
ReplyDeleteHow do i print with silhouette?
Hi Jin! I have a question... I can't "drag and drop" the background papers like you do. I can "drag and drop" to the backgrounds folder in "My library", and use it from there... Is it because I'm using the basic Silhouette Studio Software? Than you so much for your tutorials. And a tip that I recently tried an it worked: I maximize the use of the page reducing the margins and the size of the registration marks to the minimum. Works really well. Thanks again! Nilda.
ReplyDeleteIt used to be that the drag-and-drop worked with the basic software but a few updates ago, Silhouette took that feature away so that it only works with the Designer Edition upgrade. Sorry about that!
Delete{ p.s. thanks for the tip on the margins and reg marks. ;) }
Thank you so much for the super fast replay!! Hope you have a wonderful year!!
ReplyDelete