This page may contain affiliate links. If you click and make a purchase through these links, I may earn a small commission at no additional cost to you. Click here to see my full disclosure policy.

Thursday, April 29, 2010

Tutorial UPDATE: Canvas Painting with the Cricut.


So when I posted my last tutorial, I mentioned that I was pretty sure that I was doing something wrong. I think I have figured out at least one thing. This new and improved tutorial will make painting on canvas using Cricut cut outs a lot easier. Read on to find out what's changed....


The supplies are still mostly the same but do you notice that the paper cutouts are missing?


Tada! This is the "secret ingredient". Good old contact paper that you can buy from Target or Walmart. I had struggled to get freezer paper to stick on canvas and then I had an Eureka! moment. I could use vinyl but why not the cheaper alternative?

So instead of cutting the images out on cardstock, I cut them out on contact paper and use them as my stencils for painting on the canvas. I cut the contact paper out at the following settings: Speed 3, Pressure 3, and Blade Depth 3.


The first steps remains mostly the same as the last tutorial. Basically, you want to give the canvas a good base coat. I think I did 3 layers of paint. You have to remember to let the paint dry in between layers.


When you are certain that the base layers are dried, it is time to lay down your stencil. You must make sure that the stencil sticks to the canvas as much as possible. I use a craft stick to rub down the contact paper. This is especially important with the edges. You really want as little paint to run under the stencil as possible. Don't be afraid of rubbing down the contact paper. It will stick to the canvas but it will not pull up the paint. If you are not sure if your contact paper is too sticky, try it on one of the painted sides. Rub it down hard, let it sit for a couple of minutes and then pull it off. If paint comes off with it, then you need to use a different roll or brand. I did not use vinyl for this but I don't see why it shouldn't work.


For this project, I am using the apple image from the Create-A-Critter cartridge. I cut it at 6.5". Before I started painting on the apple, I pencil in the edge of the stem so that I know where not to put red paint on.


 Go ahead and paint a few coats of red and green and then let it dry fully.


Once the paint has dried, you may lay down the new stencil for the body of the fruit and the leaves. Again, rub it down hard, especially at the edges. Do not remove the first stencil.


Paint in the stem, eyes, and mouth. Paint in the the blush too. Again, you might want to put down 2 coats of paint for this. Let the whole thing dry.


Finally, gently pull off the contact paper to see your complete artwork.


***

Now, be aware that there is a lot of texture on canvas and that paint will want to go where there is unevenness.


I was impatient and did not rub down the leaves stencil as much as I should and paint got under the contact paper. I used a sanding block to sand off bits of the green and then paint over that with more yellow.

I really like the end result. I hope that you will give this a try too.

You can download your apple stencil here:


 You will need Cricut Design Studio to open the file and to cut the images. CDS is wonky at times. For the apple's blush, I have used the hidden contour feature to hide one circle of each pair of blush. If the circles are not hidden when you open up your downloaded file, please hide them again as you do not want to cut out the extra circles. When you preview the file, it should look as exactly as pictured above.

Enjoy!


Blog Awards: 1, 2, 3!

When I started this blog, I was using as a way to keep a record of the cards that I made. I didn't think that anyone would care for what I do. When I got my first follower (Hello, Heather!), I was beyond excited and so very flattered. To know that someone else find my work interesting enough to follow my blog is quite the awesome feeling. But then 3 wonderful ladies offered me the ultimate encouragement...they gave me Blog Awards! I am floored. To think that these super cool, and super creative crafters actually considered my blog worthy enough for an award!Wow...

While I have not actually followed the rules to claim the awards, I still wanted to thank these ladies:

1. Joanna at http://scrap-making.blogspot.com/ for presenting me with my first ever blogger award.  Thank you so much, Joanna!


2.) Kim V. at http://kreations-by-kim.blogspot.com/. Thank you so much for the award and for all the encouraging words that you have given me. 


3.) Gina at http://gigiscreativedesigns.blogspot.com/. Thank you for all the kind comments and for considering me for this wonderful Sunshine Award. 


Thank you again, Joanna, Kim, and Gina. You all do such wonderful work and I am truly grateful for all the encouragement you have given me. 

Thank you. Thank you. Thank you. :-)

Wednesday, April 28, 2010

Tutorial: How I paint on canvas


That's right. The title of this post is "How I paint..." and not "How to paint..." because I am not an artist and I am pretty sure that I am doing something wrong here. I managed to get my critters on canvas using my way but if you know of a better method, do tell. :-)

To begin, let me just say that I have tried the "freezer paper method" but it did not work for me for canvas. The freezer paper did stick somewhat but it really wasn't sticking like it does on t-shirts. In the end, I thought it was more trouble than it was worth so I decided to do this my way.

Also, if you are doing this for the first time, be aware that it takes quite a while to finish the project. You need to allow the paint to dry before applying a new coat. This is not a project to do when you are pressed for time or when you have to babysit an impatient 4 year old. 

Having said that, here we go:


These are the supplies that you'll need. Well, except for the eraser, which you might not have a need for. I'm not sure why I even put that in the picture. You will also want to have some Painter's Tape too. I forgot to include that in the photo above. Remember: No to eraser, Yes to Painter's Tape.


I bought the 8"x8" canvas from DickBlick.com but you can easily find these in Michael's and probably Joann's. The Create-A-Critter panda was cut at 6.5". Just place it in the center of the canvas, hold it down with one hand and...


..paint the first coat of red with wild abandonment.


This is how my canvas looked like after the first coat.


After the paint dries, do the exact same thing again with the same stencil to paint a 2nd coat of red. If you feel like it, go ahead and paint the 4 sides of the canvas too.


Once the red paint has dried,  place the 2nd stencil and hold it down with painter's tape.


This time go over the canvas with white paint.


When that dries, go ahead and paint a 2nd coat of white. Then, clean up the edges with some red. I used a #4 round brush for this but you can use any paint brush you are comfortable with.


Acrylic paint is pretty thick and it dries quickly. Once you remove the stencil, you should see that the thickness of the dried paint forms an edge that helps to define the outlines. Imagine that when you run your fingers over the white paint, you can feel where it ends. That is useful because it helps to guide the paint brush later.


To paint the eyes and nose, tape down the new stencil and trace the pupil (eye) with a pencil. This is to define the area to NOT paint when you start with the black layer.

You can use your paintbrush to paint the black.


Next, remove the stencil and replace it with the negative, as seen in the next picture:


Time to paint more black. Again, use the paintbrush for this and not the foam brush.


You can start with the ears...


...then the arms, and finally the legs. Or you can start with the legs. Or the arms. I won't judge. Promise. Just remember to paint 2 coats of black. Or not. Since black is so....well, dark, you might get away with just one coat. I painted 2 coats on mine.


Finally, fill in any rough/unpainted areas and paint the sides with one more coat of red.


Put your paintbrush down, crack a huge smile and make everyone nearby address you as "The Artist".


Final step: Once the paint has dried, hang it up, then stand back and admire your handiwork. Give yourself a pat. You have painted a new art piece for your home.


---
That's it! Even though it's a little time-consuming, I found painting to be rather therapeutic. Give it a try and do come back to share your new art work. You can find all the supplies at Michael's and probably even Joann's. Just go buy your supplies and come back here to download your stencils and you are ready to paint!
Download stencils here:


I used Cricut Design Studio to weld the base layer with the 1st layer to make the  3rd stencil shown in this post. You must have the program in order to open my file.
I hope that you enjoy this tutorial.

Have a Great Wednesday!

Monday, April 26, 2010

Sunny Days (Panda Family)


Although I had fun painting the panda family, I realized that it can only be enjoyed by whoever visit my house, and even then only when they go to the kids' playroom. I decided to use the same layout for a card so that the receiver of this card may enjoy the panda family just as much. :)


This square tri-fold card measures 5.5" x 5.5" when fully folded. I used MTC to weld (and then flip) the pandas before further welding it with an oval for the card front. To make the card base, I welded the card front with two 5.5" x 5.5" squares for the remaining sides of the card.


The pandas are cut at 1.5", 2.5", and 3". The sun was cut at 1.5". The (Paper Pups) clouds are cut at 1". I used Sesame Street Font for the sentiment. I welded the letters and made a shadow layer using MTC. If you would like the MTC file for the card base, just let me know. I would need to clean up the file a little but I would be happy to share if there is interest. 

Have a great Monday and hopefully we all have mostly sunny days this week. :-)

-----

Edit to add:

I've had several requests for the card base so here it is:

Panda Family Card Base (MTC required)


Just click on the link above and follow the directions to download the file. Please note that I used Make-The-Cut software to make the card base. You must have the program in order to open the cut file. It will not work in Cricut Design Studio.

When you open the cut file in MTC, you will be able to cut out the cardbase, the half-oval card front, and the 5.5" square for the second fold. The card base measures 16.5" when it is fully opened up so do make sure that you have a piece of cardstock that is long enough. All images are from the Create-A-Critter cartridge except for the clouds (Paper Pups) and sentiment (Sesame Street Font).


Please leave a comment to let me know if the download works (if you download the file) or if you have any other questions.

Enjoy! :-)

Panda Family


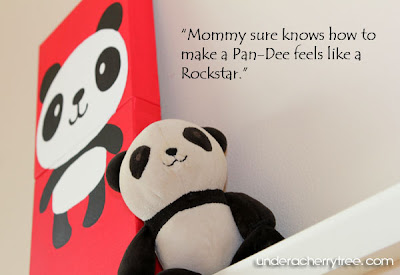
I had so much fun painting Pan-Dee on canvas I thought I would do it again but this time with his family. 


The blank canvas is from Michaels' and comes in a pack of two. You can often find it on sale for $5 for the pack. Using the Create-A-Critter cartridge, I cut out the panda image in 3 sizes. I wished there was an easier way to do this but the freezer paper method (using fabric paint) that worked wonderfully on t-shirts did not work as well here. I don't know if it is because that the canvas has been pre-treated with Gesso but for some reason, the freezer paper does not stick to the canvas. I decided to do this the old-fashioned way. I used the Cricut cut-outs as a stencil and traced around it with a pencil onto the canvas.


I put several coats of acrylic paint for each color and I thought it turned out pretty well. So I forgot to put a flower on Mama Panda but I think I can get away with gluing on a Prima flower on her later. By the way, the clouds are from the Paper Pups cartridge.

Tuesday, April 20, 2010

Create-A-Critter on Canvas


"Hello....if you think you've seen me before, you have! 
I'm on page 62."  :-)


The first time I set my eyes on this hedgehog, I thought it was too cute to keep on a card. Somehow it seems like it belongs on a place where it can be more visible and can be better appreciated. Where anyone who walks pass it, can stop and tell it how adorable it is....

Like on a canvas hanging on the wall.


The truth is I am no artist. I've tried many times before but I. Just. Can't. Paint. That doesn't mean I wasn't going to try to set this hedgie free from paper.


Armed with my Cricut, my canvas, acrylic paints, freezer paper, and hot iron, I fought to put this hedgie on the wall. It wasn't without a struggle as I found out painfully that the freezer paper did not stick to my canvas like it does to fabric (t-shirts). Nevertheless, I think a battle was won. This hedgie is now sitting on my wall looking at me, as I am here looking back at it. :-)

Saturday, April 17, 2010

I'm just a Love Machine


I've decided that I've been totally spoilt by Create-A-Critter. It was so easy to assemble all the layers in CAC that I forgot that most cartridges do not layer so easily at all. In fact, it seemed more like a fluke that layering was so easy with that cartridge and as I found that normally layering character cutouts was a little more complicated.


As I flipped through the Robotz handbook, it brought back terrible memories of the Hello Kitty Greetings cartridge.  Check out the layers for the robots ' eyes. Look familiar?


Then again, it is because of that Hello Kitty cartridge that I knew right away not to waste my time and paper trying to cut this robot at a size that make it impossible to layer those minute parts.


To make this card, I cut out the robot at 5 1/2". The face, body, and wheels were cut and embossed with Cuttlebug's hearts folder. The heart cutouts are from the Love Struck cartridge. I used Lettering Delights' LDJ Space Monkey font for the sentiment. I added in some eyelets in square and heart shapes to make this card a little funky. The overall size of the card measures 7 1/4" x 7 1/4 ".


Despite the crazy small layers, I have to say that I do like this cartridge a lot. Once I figured out how the layers should come together, it wasn't so scary to cut and assemble the character. I just have to remember to cut it at a size that is 5" or more.  I'm not really fond of layering bit parts with tweezers.